Optimizing Your Gear Juicer
Last updated on
Tips on caring for, understanding your gear juicer and getting the most out of it.
If you own a masticating juicer, or just bought one, these tips will be helpful for you to get the most out of it, and make juicing an enjoyable experience.
By masticating juicer, I mean any of the models listed on these pages, and similar:
Caring For Your Gear Juicer
Most gears/augers of older version single-gear juicers are made of white or other light-colored melamine that get discolored due to the pigmentation of fruits and vegetables. To prevent this, always wash up your juicer immediately after use.
If your gear/auger is already stained, you can soak it for a couple hours in a soda bicarbonate (baking soda) solution of 1 capful to a small tub, then scrub to remove the stain.
I often have requests to replace broken gears because the user used a spoon or other cutlery (instead of the food pusher provided) to push the foods into the chute, WHILE the juicer is operating. DO NOT do this. If you absolutely have to do so because you don’t have a food pusher, then turn off the motor first before you do so.
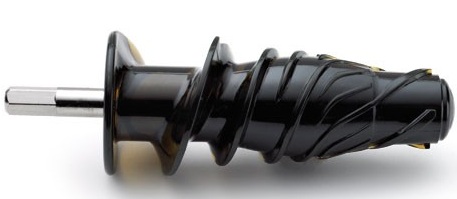
Most gears/augers of older version single-gear juicers are not as hardy as you would like, so DON’T drop them. The newer version gear juicers have come up with augers made of GE Ultem material, supposedly 8x hardier than the original ones. And they are also black in color to prevent unsightly pigmentation stains.
Examples of these newer version juicers:
Omega J8006, JuicePresso, Hurom Slow Juicer, Omega Vert
Tips And Tricks On Optimizing Your Gear Juicer
- If you can afford the space, keep a small strainer basket beside your sink to contain your juicer parts for drip dry. Leave the juicer motor on your kitchen counter top so that it’s easy access to encourage daily juicing.
- Most collection bowls are made to fit the curves of the juicer. Look at your own juicer and the collection bowls and see how they are made to fit each other snugly. Get it right, to prevent spills when the juice is being extracted.
- This is a common problem with many gear juicers that most users have no clue what to do: Ever encounter that when you juice soft fruits (e.g. tomatoes, oranges, mangoes) that the juicer is not able to extract the juices? This is because there is no fiber to “push” the juices through the straining screen. To overcome this problem, alternate your soft fruits with harder fruits or vegetables (e.g. apples, celery, carrots, etc.) Note: When buying apples for juicing using your gear juicer, go for the Granny Smith variety as they are crisp. The Gala and Golden Delicious varieties are more “mushy” and not suitable for juicing. Always put through the small pieces of fruits/vegetables through during the first half of juicing. For example, a bunch of parsley, or an inch of ginger, in order that they get juiced totally.
- Always try to end your last piece of fruit/vegetable for juicing with one that will not stain the gear. For example, a carrot or a beetroot has heavy pigmentation and will stain the auger. If juicing just beetroot, add in a lemon last so that the lemon juice will “self-clean” the auger. Keep your auger almost pigmentation-stained-free!
- Did I mention to include a quarter of a lemon or a whole lime into your green juices every time, to enhance the taste of the juices? Lemon also multiplies absorption of the other nutrients by up to five times more!
- When juicing wheatgrass, barley grass, or other grass, some juicers tend to “heat up” at the cap. Using your 6-in-1 or 9-in-1 juicer to make pasta may also cause the cap to heat up and expand. There is nothing wrong with your juicer. It is just due to the friction of the gear pushing these fine stuff through the strainer. In these cases, just wait till the cap cool down before you dismantle.
Remove Mold From Your Juicer
Always wash up your juicers and put them away, immediately after juicing, to prevent pigmentation stain on the juicer, or even mold growth. Should you ever be unfortunate to “forget” to wash up and there is mold growth, here’s a tip for removing the mold:
Scrub off the visible mold under running water and wash off with mild dish detergent. To ensure you kill the mold and spores (spores can survive longer), spray any of these generously on the affected areas:
- Hydrogen peroxide (3% solution);
- Lemon juice; or
- Vinegar
Never use Chlorox or bleach. Leave for about 20 minutes and wash them off again under running water with dish detergent and a dish scrub.
With very stubborn stains, boil the parts in strong vinegar solution to soften the stains. Leave to cool and scrub out the stains.
Some of the links I post on this site are affiliate links. If you go through them to make a purchase, I will earn a small commission (at no additional cost to you). However, note that I’m recommending these products because of their quality and that I have good experience using them, not because of the commission to be made.


![[Review] Omega VRT330 Masticating Juicer](https://juicing-for-health.com/wp-content/uploads/2019/08/omega-vrt330-juicer-review-90x90.jpg)


 JOIN OVER