5-Step Science-Proven Skin Care Regimen To Make Your Skin Look 10 Years Younger
Last updated on
When it comes to developing a skincare regimen to achieve your desired results, it’s incredibly important to not only determine which products work best for your skin, but also the order and manner in which to use them. But with so many incredible options out there, finding the quintessential routine can feel quite challenging — even for skincare product enthusiasts!
With that being said, our goal with this guide is to relieve you from that daunting challenge of finding the best skincare regimen by proposing a highly effective routine that can restore your skin to a younger, healthier and nourished look and feel.
But before we dive into our recommended skincare regimen, there are a few things we would like for you to keep in mind as you read on.
It’s important to note that each person’s skin type is different, and that what works best for some may not work as effectively for others. We definitely encourage you to make tweaks to your personal skincare regimen based on your own specific needs, preferences or lifestyle.
For instance, you may find that your skin will look better by trying certain products more frequently than others, or even by skipping certain steps entirely.
So, don’t be afraid to tailor your routine to what suits you best! This guide, along with the conclusions you make on your own, should help you find your go-to skincare routine in no time. Now that we’ve got that out of the way, let’s get started, shall we?
Easy Skin Care Regimen To Look 10 Years Younger
Step 1: Cleanse Skin
This first step towards achieving younger, healthier and more radiant looking skin is a very important one, as it plays a pivotal role in preparing your skin for other essential products you will be using. Why, you ask? Well, facial cleansers gently remove dirt, makeup, bacteria and old surface skin cells from the skin without completely stripping the skin of its natural oils.
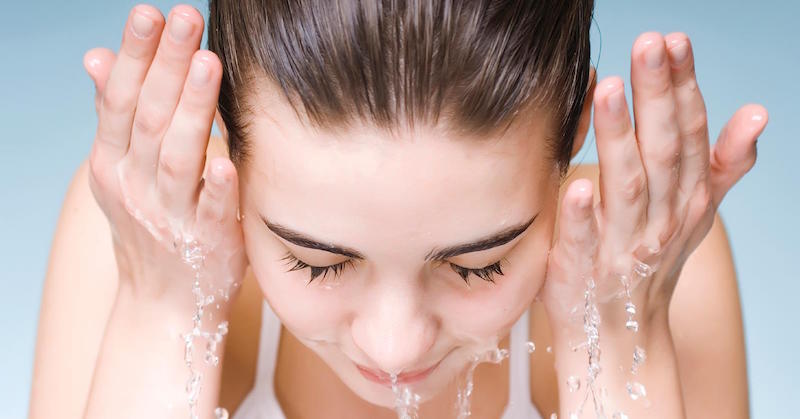
What this does is to clean and smooth out your skin and pores to enhance the effectiveness of the topical products you will be applying during your daily regimen. Think of it as the step that gives you the blank canvas you’ll need for a beautiful painting!
Recommended Use
Frequency:
Twice a day—once in the morning and once at night.
Directions:
Apply your facial cleanser to a washcloth, pad or cotton ball. You may also use your clean hands. Wipe pad or cotton ball gently onto the face to remove dirt and impurities, and follow that up by rinsing your face with lightly warmed water and patting it dry with a clean face towel.
Helpful Tips:
Cleansers can be applied to a dry or wet face. If using an oil cleanser, we recommend applying onto dry skin.
- You can use certain cleansers to wipe around your eyes and gently yet effectively remove makeup like eye liner and mascara.
- Letting the cleanser sit for a few seconds eases the removal process.
- You can use the same cleansers (like an oil cleanser) to help clean your makeup brushes, such as an eyeliner brush. The oil will tackle any built-up material on the bristles to remove and break it apart, making the brush easier to clean.
Step 2: Refine Pores
Once you are all finished with your cleanser, you will need to immediately follow up with a professional grade facial toner. Toners serve as incredible hydrators that help restore softness, elasticity and proper pH levels for the skin after cleansing, and can even shrink pores and reduce oiliness.
There are several types of toners available, but we highly recommend using toners that include Vitamin C since it works very well with all skin types. They not only leave the skin feeling fresh and renewed, but they also protect the skin from free radicals, harmful UV damage and skin irritation.
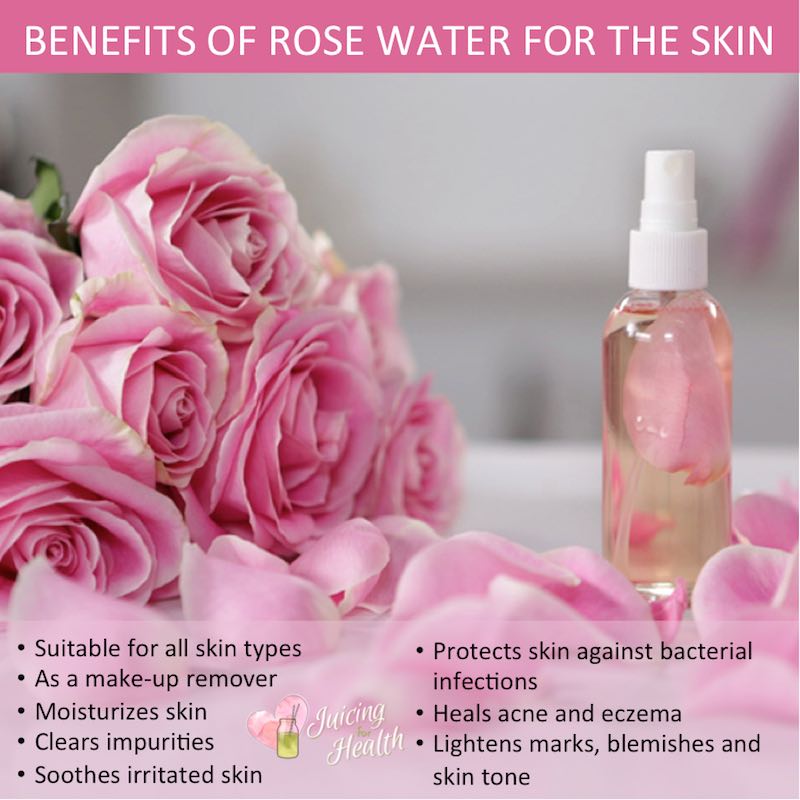
However, if you are in the mood for something simpler and versatile, we advise trying out Rose Water imported from Morocco, as it does a sensational job of toning, hydrating and cleaning the skin, among many other things! Just be sure that the Rose Water you use is 100% pure and natural, and doesn’t contain any artificial fragrances, chemicals or preservatives.
Recommended Use
Frequency:
Once a day, immediately following your facial cleanser.
Directions:
When you are finished cleansing, apply a few drops of your preferred toner to a cotton pad/ball and gently apply to the skin using upward strokes for optimal pH balance and pore tightening. Allow to dry.
Helpful Tips:
Be sure to target trouble areas such as the forehead, nose and chin, which are known to produce excess oil and clog pores.
Step 3: Apply Serum
Now this is where it starts to get interesting! Skin serums are an absolute must-have for any daily skin care regimen. These potent oil or water-based products are packed with a remarkable array of vitamins, minerals and nutrients that provides unrivaled nourishment, hydration, and increased cell protection for the skin.
Depending on the results you’re looking to achieve with your skin, there are plenty of serums out there that are formulated to tackle specific skin types. So, whether you’re looking for brighter skin, acne reduction or an anti-aging solution, rest assured that there’s a serum out there that’s right for you.
A common question many people ask is “What are the differences between serums and moisturizers?” What truly sets these highly concentrated serums apart are their uncanny ability to penetrate deeper into the skin than moisturizers. This, of course, dramatically increases the chance of seeing noticeable improvements to your skin’s tone and texture, and can bring you one step closer to having the soft, supple and luxurious skin you’ve always wanted!
Recommended Use
Frequency:
Twice a day—once in the morning and once at night. If necessary, you may scale back usage to once a day.
Directions:
Apply a small amount of serum to your hands to distribute to your entire face, neck and surrounding area. Allow to dry. If using multiple serums, use from thinnest to thickest and wait for first serum to absorb completely before layering on the next one.
Helpful Tips:
Certain serums can contain retinol, which can make your skin susceptible to the sun. In those cases, we recommend wearing sunscreen during the day for best results. See Step 6 for more details!
Step 4: Restore Eye Area
Common practice for most skincare enthusiasts is to follow-up their serum with a moisturizer. However, we strongly encourage you to put that plan on hold at this stage of your regimen, as it is the perfect time to nourish your eye area to help achieve an age-defying appearance. Eye care is key, so we definitely suggest using a gel, cream or serum specially made for the eyes.
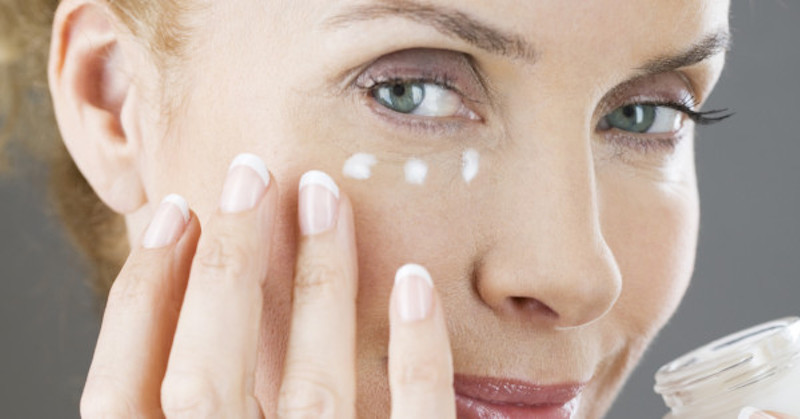
The biggest advantage to using a specialized eye gel or serum is how effectively they can tackle dark circles, eye bags, crow’s feet, fine lines and saggy skin with consistent use. Look for eye care products that include Plant Stem Cells and Peptide Complex, as they work together to increase elasticity, enhance skin tone and minimize those telltale signs of aging.
Recommended Use
Frequency:
Use twice a day, morning and night.
Directions:
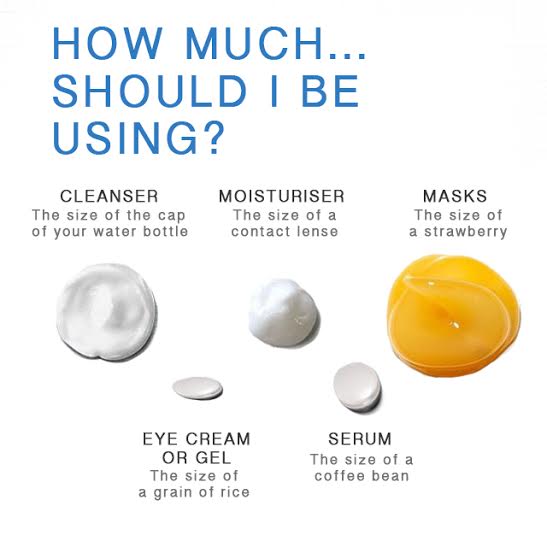
Dispense a pea-sized amount of the product to your fingers and massage it between your fingers. Then, dab gently around the eyes, forehead and cheek area. Allow to dry.
Helpful Tips:
- High quality eye gels or serums can be applied to entire face to fight the signs of aging.
- If you’re an on-the-go kind of person, you may use eye care products underneath your makeup.
- You can use both an Eye Serum and an Eye Gel for a double dose of extra nourishment to your skin for really stubborn dark circles and bags. Use the Eye Serum first, then follow up with an Eye Gel or cream.
Step 5: Apply Moisturizer
No skincare regimen is complete without a wholesome moisturizer. The consistent use of moisturizers can help you achieve a soft, smooth and dewy appearance by providing sensational hydration and nourishment to the skin, as well as supreme anti-aging support.
You will notice that most premium grade moisturizers contain Vitamin C, and that’s not a coincidence. High quality moisturizers often include Vitamin C to help give the skin powerful antioxidant protection from extended sun exposure and UV rays to keep it from getting dry or damaged.
Other great ingredients to look out for are Niacinamide, Retinol, Hyaluronic Acid, Plant Stem Cells, Peptide Complex and MSM, as well as soothing oils like Rosehip Seed Oil and Jojoba Oil. Each of these incredible ingredients work in unison to tackle wrinkles, fine lines, age spots and discoloration to help give you the younger, more vibrant look you’ve always wanted.
In other words, moisturizing is a must — day or night!
Recommended Use
Frequency:
For best results, use morning and night. For sensitive skin, use once a day.
Directions:
Cleanse and tone skin prior to applying your moisturizer. Then use serum(s), if applicable. Distribute a small amount of your preferred moisturizer on face and neck with your fingertips in a circular and upward motion. Let the cream absorb completely into the skin.
Helpful Tips:
- Certain moisturizers can contain retinol, which can make your skin susceptible to the sun. In those cases, we recommend wearing sunscreen during the day for best results. See Step 6 for more details!
- You can wear certain moisturizers underneath makeup.
- Some moisturizers can also be applied on the body and around the eyes for extra nourishment. Use it on your feet, elbows or anywhere else for soft, supple skin, or apply it on your shoulders and/or décolleté to help reduce the signs of aging such as age spots and hyperpigmentation.
… OR Apply Natural Oils
If you want to take your skincare regimen to the next level, be sure that you don’t leave out a powerful and nourishing natural oil, as they can work wonders for the skin’s texture, evenness and hydration.
When looking for the best natural oil for your skin’s needs, it’s incredibly important that you settle on a product that is 100% pure and certified organic. That way, you will not be exposed to any needless fragrances, chemicals and preservatives that stand in the way of the benefits.
Speaking of the benefits, natural oils like Argan Oil, Jojoba Oil or Rosehip Seed Oil, all function as incredible multi-purpose products that can do far more than improve the quality of your skin. Some contain a wealth of invaluable vitamins, minerals and nutrients that can actually help better your hair and nails as well. So needless to say, these versatile natural oils are more than worth your time.
Recommended Use
Frequency:
May use on a daily basis, or just as needed.
Directions:
For general skincare purposes, dispense 1-3 drops of your preferred natural oil onto palms and rub them together. Massage into clean face and/or body as you would like.
- Certified organic natural oils like Argan Oil, Rosehip Seed Oil and Jojoba Oil can be used as a hair conditioner. Start by washing your hair with a mild shampoo and pat dry with a towel. Then, massage 1-3 drops of oil working from roots to tip when the hair is still a little damp. For ultimate conditioning, leave oil in for at least 30 minutes.
- Certain natural oils can also be used as an aftershave. Simply apply 1-3 drops of 100% pure natural oil to your shaven skin to achieve a nice soothing feeling.
- For nail care purposes, Argan Oil, Rosehip Seed Oil and Jojoba Oil can help strengthen nails and prevent them from peeling or cracking. All it takes is 1-3 drops massaged on your nails and cuticles, and you’re set!
Weekly Skincare Tips
This section of our comprehensive skincare regimen will highlight two all-important steps you should incorporate into your routine once or twice a week to continue achieving outstanding results for your skin!
Dead Sea Mud Mask
Dead Sea Mud Mask products are a fun, relaxing and results-oriented step of our skincare regimen that you should try. This fascinating mud is loaded with minerals such as magnesium, sodium, bromine, potassium, calcium and 16 more.
Those rich minerals team together to absorb into the skin and sponge up any excess oil, dirt, toxins and impurities that may reside on the face and body.
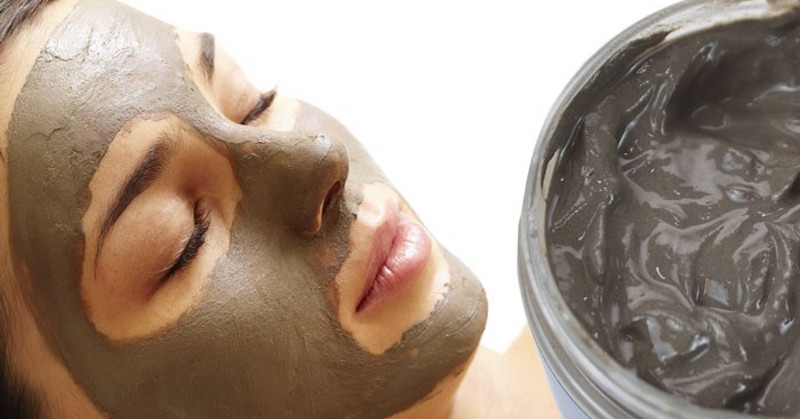
Dead Sea mud has even been shown to help reduce acne, pimples and blackheads to achieve a more even and smoother skin tone. Simply put, this stuff is awesome! Millions of men and women around the world consider Dead Sea mud the ultimate addition to their therapeutic in-home spa treatment. After a few weeks of use, you should start to notice your skin becoming more radiant and refined than ever before.
Get the recommended Calily Premium Dead Sea Mud Mask here.
Recommended Use
Frequency:
Once or twice a week.
Directions:
Apply a thin layer of mud mask to clean skin. If applying on the face, avoid the eye and lip areas. Leave mask on for 10–15 minutes until dry. Use warm water and circulation motions to gently remove the mud mask from the skin. Pat dry with a clean cloth.
Helpful Hints:
- We suggest limiting Dead Sea mud use to just once or twice a week to prevent any kind of skin irritation from occurring.
- You don’t always have to wear it as a mask! If you happen to have pimples, blackheads and acne on your skin and don’t want to get your hands too dirty, it is helpful to dab a dot’s worth of Dead Sea mud on the specific problem area for a quick fix.
- Dead Sea mud can also be applied on various parts of the body — which is especially useful for individuals with eczema and psoriasis. Simply apply where needed, and step into your shower and rinse the mud off with warm water for better mess-free results.
- Dead Sea mud is a super useful form of skin treatment, but be sure to do a little research to see if any ingredient featured in Dead Sea mud can cause you discomfort based on your specific skin type.
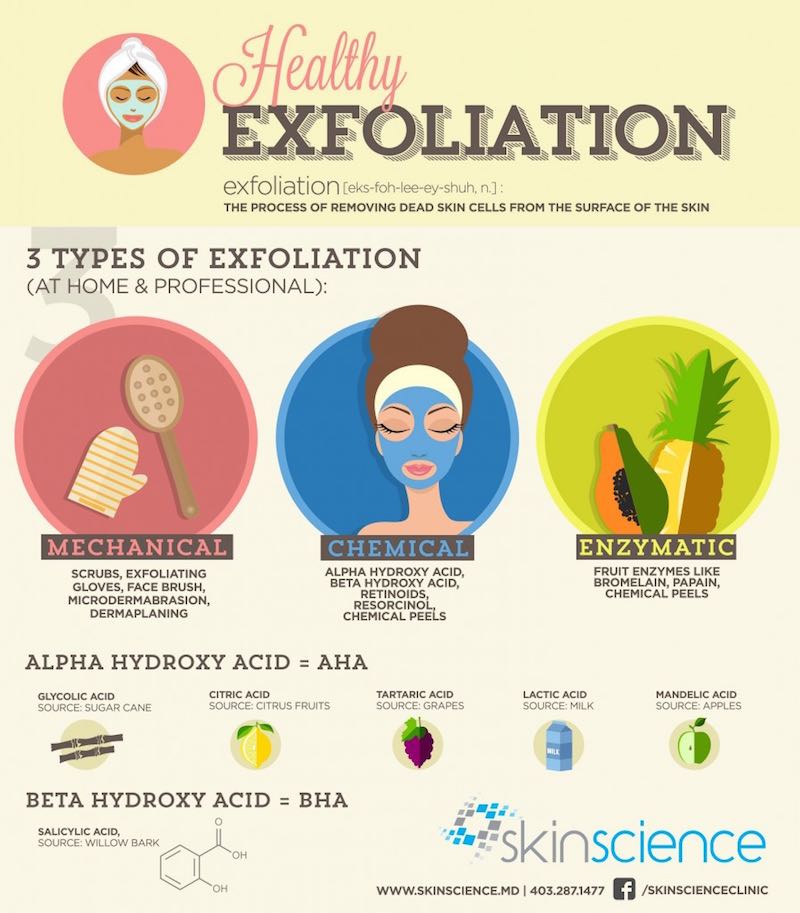
Exfoliate
Some of you may be a tad surprised as to why we recommend exfoliating only once or twice a week — especially since it’s such a popular step in most other skincare regimens.
There’s no doubt that exfoliating the skin is a great step to help unclog pores, reduce redness and diminish blackheads, wrinkles and breakouts. However, it is important to exfoliate in careful moderation to prevent the skin from becoming too stripped and irritated.
We recommend using a gentle, skin-strengthening facial scrub that has high Vitamin C content that gives the skin supreme antioxidant protection, and help diminish fine lines, wrinkles spots and blemishes for a smooth, sleek and even tone.
Recommended Use
Frequency:
Once or twice a week.
Directions:
Use a small dollop in a circular fashion on face and/or body for gentle exfoliation. You can use your fingertips or with a washcloth. Rinse off with lukewarm water. For best results, pat the skin dry and follow up with a toner, serum and moisturizer (back to Step 2).
Helpful Hints:
- There are plenty of great do-it-yourself scrub recipes that are out there that are worth trying. Try mixing 1 cup of brown sugar, ½ cup of fine seasalt and 2 tablespoons of extra virgin olive oil in a bowl and apply it to wet skin for great results!
- A washcloth or a loofah may be helpful to help you exfoliate, instead of using a scrub. Simply wet a washcloth or a loofah, and gently work your preferred product into your skin in circular motions.
Final, Important Step … Have Fun!
Now that you have this step-by-step skincare regimen handy, you should be well on your way towards having radiant and gorgeous looking skin, so enjoy it! There’s nothing quite as exhilarating as looking at yourself in the mirror and seeing noticeable differences in your skin’s tone and texture. So, stick with your routine and take pride in it.
This article was originally published on Instanatural.com. It is republished here with permission (in partnership with FamilyLifeGoals.com).
Some of the links I post on this site are affiliate links. If you go through them to make a purchase, I will earn a small commission (at no additional cost to you). However, note that I’m recommending these products because of their quality and that I have good experience using them, not because of the commission to be made.
Comments
Leave a Reply


 JOIN OVER
Amazing Post and great content. Thanks for sharing this article.Thanks Again!!