How To Grow Wheatgrass At Home For Your Endless Juicing Supply
Last updated on
Step-by-step guide on how to grow your own wheatgrass at home for a daily shot of “Liquid Sunshine” ~ the ultimate blood purifier.

How To Grow Wheatgrass At Home
There is so much precious goodness all crammed into wheatgrass juice that it’s no wonder that it’s called the “Liquid Sunshine”. All the best under the sun, are found in wheatgrass and the best way to get to them, is from wheatgrass juice — coined “The Nectar of the Gods, the Ultimate Blood Purifier“.
To ensure continuous supply of this superfood, why not sprout your own? You can obtain the wheatgrass-growing supplies from your local organic shop or health store.
It really isn’t that difficult to sprout wheatgrass and you can do it yourself at home. Not only do you get the good feeling of harvesting your very own miracle food, it also brightens up your home with its cheery green.
But, before we start, you will need to know the differences between growing your wheatgrass with soil and without soil.
How To Grow Wheatgrass Without Soil
The process of growing wheatgrass in water, and without soil is known as hydroponics.
Traditionally, plants obtain their nutrients from soil. With hydroponic plants, care needs to be taken to provide the plant with nutrients from a solution instead.
Plants can make their own vitamins, so you will get a decent amount of vitamins growing wheatgrass hydroponically, as if you grow them in soil. It is the mineral content that may be lacking in your wheatgrass when grown without soil.
One way of getting around this would be to add nutrients to the solution they are grown in, such as calcium, magnesium, zinc or iron. However, this way of doing it is only recommended if you know what minerals your body needs more of, in order that there won’t be a mineral imbalance when consuming the resulting wheatgrass juice.
If you are growing wheatgrass for juicing, it is advisable to grow it in soil. Scroll further down for step-by-step guide on growing wheatgrass in soil.
Supplies For Growing Wheatgrass Hydroponically
1. Organic wheatgrass sprouting seeds
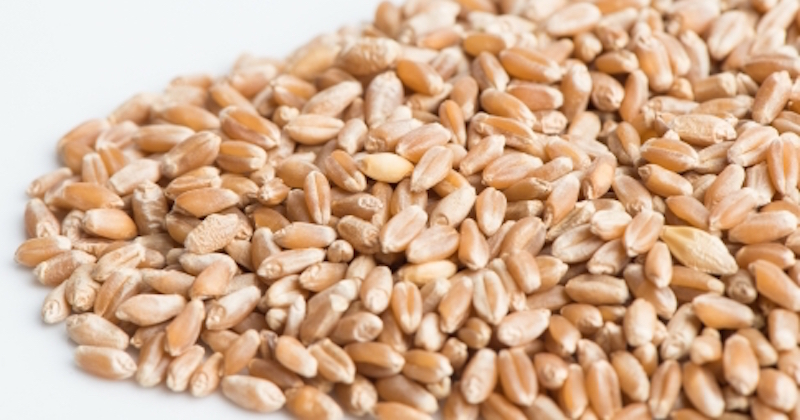
The most important thing in growing wheatgrass is of course the wheatgrass sprouting seeds. Always get only organic, non-GMO, to ensure that your crop will be of the highest quality, taste, and yield.
The best wheatgrass seeds for sprouting are the “hard red winter wheat seeds”. You can buy them from health food stores or on the internet.
Dry seeds should be stored in a cool dry place. To extend the germination life of the seeds, you may store them in the fridge. When stored in the freezer, they can last indefinitely.
Here’s a recommended source of wheatgrass seeds that you can buy in small packets weighing 16 ounces.
2. BPA-free seed sprouter tray with small holes
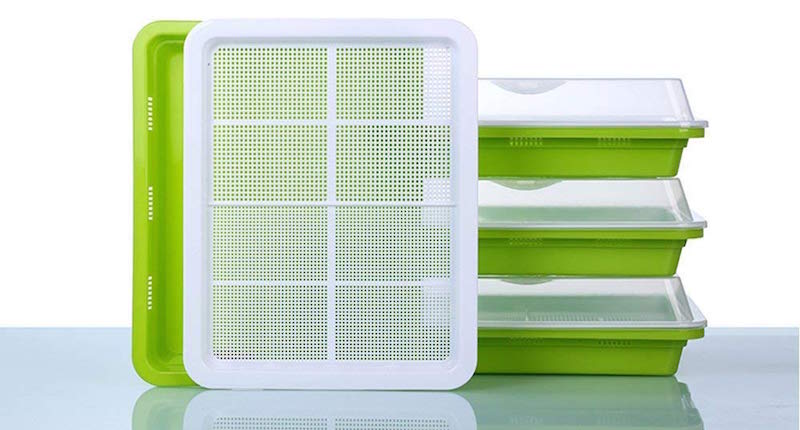
You can get one, or a few of these lightweight seed sprouter trays here. These trays have fine holes grid, suitable for sprouting seeds of soya bean, mung bean, peas, wheat, alfalfa, etc.
Step-by-Step Guide On Growing Wheatgrass Hydroponically
Step # 1: Pre-sprouting/Germinating
Pre-sprouting is important to ensure a good crop. Follow these steps to pre-sprout your wheatgrass seeds to ensure that your crop grows at a much faster rate.
- Measure out a bowl of seeds. Amount: estimate enough to fill one layer of seeds on whatever the size of your tray.
- Rinse the seeds in clean water, drain, then soak the seeds in a container with about 2-3 times of cool water.
- Soak for about 8-10 hours.
- After 8-10 hours, drain the water, then soak them again for another 8-10 hours.
- After the second set of 8-10 hours, drain the water, then soak them once more the same for another 8-10 hours.
- Check if it has sprouted roots of at least 1/8 of an inch to 1/4 of an inch.
Step # 2: Preparing the Tray
Once your seeds have sprouted, drain the water, leaving the sprouts damp. Spread them out evenly and densely in one layer, in your seed sprouter tray that has fine holes, with the water container tray underneath to collect water.
Place your tray under indirect sunlight, probably inside your house, near a window and with proper ventilation. Wheatgrass does not like hot direct sunlight.
Step # 3: Watering
Same as growing wheatgrass with soil – see below.
Step # 4: Harvesting
Same as growing wheatgrass with soil – see below.
How To Grow Wheatgrass In Soil
As explained above, it is recommended to grow wheatgrass with soil. Plants obtain their nutrients from soil. So using soil that is chemical free and rich in natural fertilizer is ideal.
Supplies For Growing Wheatgrass In Soil
Growing wheat grass at home is so easy and inexpensive. You will need these:
1. Organic wheatgrass sprouting seeds
Always get only organic, non-GMO, to ensure that your crop will be of the highest quality, taste, and yield.
The best wheatgrass seeds for sprouting are the “hard red winter wheat seeds”. You can buy them from health food stores or on the internet.
Dry seeds should be stored in a cool dry place. To extend the germination life of the seeds, you may store them in the fridge. When stored in the freezer, they can last indefinitely.
Here’s a recommended source of wheatgrass seeds that you can buy in small packets weighing 16 ounces.
2. Organic potting soil and fertilizer
Your regular garden soil might be too dense for sprouting wheatgrass. Use a lightweight potting mix that is enriched with organic or natural fertilizer.
3. Plastic gardening trays with drainholes
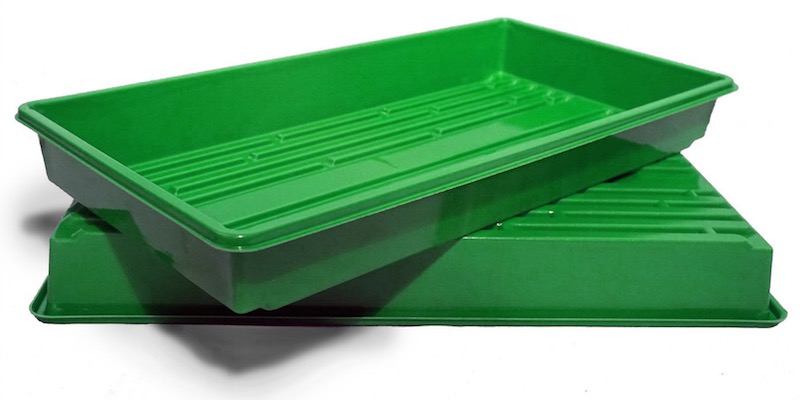
Plastic gardening trays can be reused over and over again.
A 21″ x 11″ x 2″ sized tray can yield about 14-18 ounces of wheatgrass juice (assuming you drink about one shot a day, it should last about a week).
You can get some wheatgrass trays here.
4. A spray bottle
A spray bottle is an essential tool to have when growing wheatgrass. You will need to keep the soil nice and moist, not soaked. Using a spray bottle ensures that you do not overwater. You can get a cheap spray bottle from the Dollar Store.
Step-by-Step Guide To Growing Wheatgrass In Soil
Step # 1: Pre-sprout/Germinating
Organic wheatgrass seeds are recommended for sprouting to ensure the sweetness of your wheatgrass juice and that it will contain the optimum vitamins and minerals that will boost your health.
- Pre-sprouting is so important to ensure a good crop. Follow these steps to pre-sprout your wheatgrass seeds to ensure that your crop grows at a much faster rate.
- Measure out a bowl of seeds. Amount: estimate enough to fill one layer of seeds on whatever the size of your tray.
- Rinse the seeds in clean water, drain, then soak the seeds in a container with about 2-3 times of cool water.
- Soak for about 8-10 hours.
- After 8-10 hours, drain the water, then soak them again for another 8-10 hours.
- After the second set of 8-10 hours, drain the water, then soak them once more the same for another 8-10 hours.
- Check if it has sprouted roots of at least 1/8 of an inch to 1/4 of an inch.
Step # 2: Preparing the Tray
 Line the bottom of the tray with unbleached paper towels so that the roots do not protrude at the bottom through the holes in the tray.
- Fill the tray with pre-moistened soil, compost or potting mix to about one and half inch of the tray depth. Ensure that your soil does not contain artificial fertilizers or chemicals. Always use organic.
 Line the bottom of the tray with unbleached paper towels so that the roots do not protrude at the bottom through the holes in the tray.
Step # 3: Planting
- Lay out the germinated seeds evenly and densely in one layer, on the damp soil in the tray. Gently impressed the seeds into the soil.
- Place your tray under indirect sunlight, probably inside your house, near a window and with proper ventilation. Wheatgrass does not like hot direct sunlight.
Step # 4: Watering
The young shoots need to be watered at least twice a day to keep them nice and moist. If the soil gets dry, the young shoots may die off before they root. To help prevent this, put a sheet of damp newspaper over the tray to keep them moist until they grow to about an inch high.
To water, use a spray bottle, adjusting to light-medium. When the shoots are above one inch, probably about day 5, reduce watering to once a day in the morning. But always ensure that the water is just enough to keep the soil damp to the roots. Avoid over-watering.
In warmer and humid climates, mold may tend to grow in your wheatgrass tray. This is a common problem but is harmless. When harvesting, just cut above the affected area, avoiding the mold. A blowing fan during humid days may help prevent mold-growth.
Step # 5: Harvesting
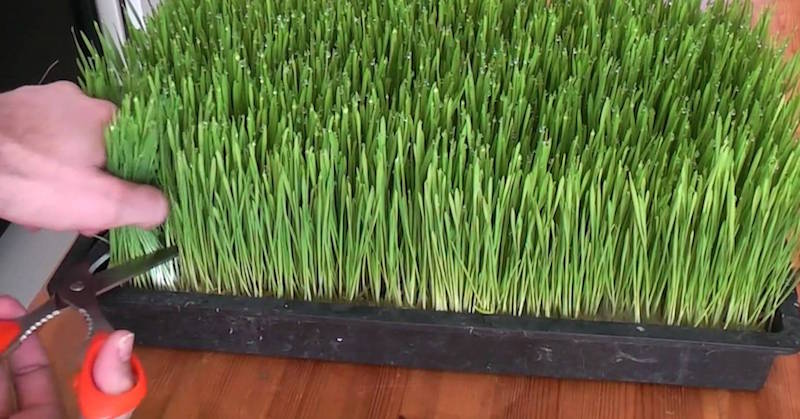
When your wheatgrass grows to about 6 inches (about day 9 or 10), it is ready for harvesting. Use a pair of scissors and cut the wheatgrass just above the seeds.
If there is mold, avoid and cut above it. You need about a bunch of the grass to make about 1 ounce of shot enough to give you energy for a day. Cut just prior to juicing to ensure freshness.
A tray the size of 21″ x 11″ should be able to provide you enough wheatgrass for about 14-18 ounces of juice.
Note: You may continue to water the crop to produce a second or third crop though they may not be as tender nor grow as tall. But you get extra ounces from it. Otherwise, clean the tray and start a new crop.
Step # 6: Juice and Enjoy

Rinse your wheatgrass and juice. Do not take more than one ounce a day if you are not accustomed to drinking juices. Wheatgrass juice is such a powerful cleanser that it may cause you some healing reactions.
Read about the many health benefits of drinking wheatgrass juice, and consumption tips.
How To Grow Wheatgrass Without Mold
Moldy wheatgrass is a very common problem in tropical weather. Even though the wheatgrass mold is harmless, it may be a turn-off for most people.
Here are a few wheatgrass growing tips that you can implement to reduce/eliminate mold in your future batches of wheatgrass.
Wheatgrass Growing Tips To Prevent Mold
- Instead of soaking overnight or just 8-10 hours as suggested above, you may try to soak it a little longer (say 10-12 hours) so that the seeds expand more, allowing better germination and shorter sprouting time.
- Lay out the seeds in the tray densely, but in one layer. Try not to have them overlap so that there is enough breathing space for each sprout. This allows a little “air” to reduce mold.
- Don’t over-water your sprouts. Use a spray bottle so that you spray enough just to keep them wet, not soaked.
- Do not miss this step—while waiting for your sprouts to take root, cover with a piece of damp newspaper and spray the paper to keep it wet. But remember, do not soak. (See the video below.)
- Finally, you might even try this. Once your sprouts have taken root, put a “collecting tray” without holes under your wheatgrass tray to act as a water reservoir. So, instead of watering from the top, you water from the bottom so that the mold will grow at the bottom rather than on the sprouts. While you do this, still use your spray bottle to spray on the sprouts to keep them a little moist.
Try out some or all of the suggestions here and see what works for you depending on the humidity in your area. In tropical countries, readers have even feedback that putting a running fan towards the sprouts helped to reduce mold.
Don’t give up. I believe you will get beautiful harvests once you understand your sprouts better.
Tutorial Videos On Wheatgrass Sprouting
Wheatgrass Sprouting – Part 1 (5m 16s):
Wheatgrass Sprouting – Part 2 (4m 21s):
Other Questions You May Have About Growing Wheatgrass
How long does wheatgrass take to grow?
Wheatgrass seeds take about two days to germinate using the process that we explained above. Once sprouted and laid out in the tray, it may take another 9 to 10 days (about 6 inches tall) before you may harvest it.
Can wheatgrass grow without sunlight?
Wheatgrass does not like hot direct sunlight, so it is best to place your wheatgrass sprouting tray indoor, ideally by the window for indirect sunlight. It cannot be a place that is totally without sunlight, as all plants need sunlight to grow.
Can I eat raw wheatgrass?
Raw wheatgrass is inedible as our digestive system is not able to digest the insoluble fiber of the grass. This is why, it is best to extract wheatgrass juice to enjoy its full benefits without getting sick.
Can I regrow wheatgrass after harvesting?
After harvesting, you may let the grass grow a second harvest. However, the nutritional content of the wheatgrass from the second harvest may not be as optimal as the first harvest.
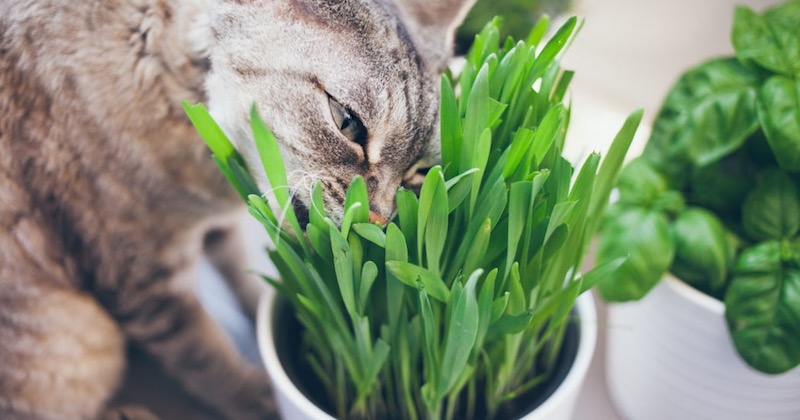
Growing Wheatgrass For Cats
If you have a cat, you may have noticed your cat sometimes chew on grass. Do you ever wonder why?
Some houseplants may be toxic to cats but wheatgrass is safe and may even be beneficial for your cat.
Wheatgrass is indigestible, that is why for us humans, we don’t eat wheatgrass but instead we extract its juice. Likewise for cats, even though they chew on wheatgrass, they are are not able to digest it.
1. Cat Regurgitates
Wheatgrass fiber helps your cat to regurgitate hairballs or something that they have eaten that they are not able to digest. The insoluble fiber binds with the indigestible foods to rid the body of potentially poisonous or inedible matter.
2. Purifies blood
Some carnivorous animals, when they are sick, chew on grass. In this case, cat chews on wheatgrass. It is believed that the chlorophyll and enzymes from chewing the grass help to purify the blood to prevent the animal from getting sick.
How To Grow Wheatgrass for Cats
If you wish to grow wheatgrass for your cat(s), do go with the hydroponic method of growing the wheatgrass, which I explained above.
Get these seeds to grow wheatgrass that are suitable for cats. The grass quality is great even for juicing for human consumption.
Some of the links I post on this site are affiliate links. If you go through them to make a purchase, I will earn a small commission (at no additional cost to you). However, note that I’m recommending these products because of their quality and that I have good experience using them, not because of the commission to be made.
Comments
Leave a Reply


 JOIN OVER
My partner and I absolutely love your blog and find the majority of
your post’s to be what precisely I’m looking for.
Would you offer guest writers to write content in your case?
I wouldn’t mind publishing a post or elaborating on most of the
subjects you write in relation to here. Again, awesome website!
Awesome post. I just got into growing wheatgrass. It would be amazing to grow your own fresh wheatgrass at your home, so you don’t have to drive to Jamba Juice.